
5 years ago I got a smoker for Christmas and I wanted to break it in with a big meat smoke on Christmas Eve. I jokingly referred to it as Meat Fest and it ended up becoming an annual thing for our family. Meat Fest has become an event that I look forward to each year. I like to think of it as my night to have friends and family over as they watch me try to cook a bunch of stuff that is far beyond my skill level. There’s nothing quite as exhilirating as putting overly ambitious meals together and putting them on display for the people you care most about to potentially witness your grandest failures. Each year I try to make the dishes a little more elaborate than the previous year. This year is the first time that I have put together the whole dinner with meat that I harvested and processed. As the meals have become more elaborate, it has certainly become a somewhat stressful endeavor, especially with this year needing to plan the meal many months in advance to have the right meats ready, but if there’s one thing I love about doing this, it’s that it gives me plenty of time to reflect on one simple fact: It’s pleasant to labor for those we love.
Canard en Croute
The first dish was the biggest wild card for me. Canard en Croute is a deboned duck, stuffed with sausage, sewn up, and baked wrapped in a pastry. I’ve made very few pastries and recently, I decided that I wanted to start cooking with fresh flour that I mill myself. Milling allows me to have a far greater degree of control over my flour than store bought flour, but it also opens up a lot of variables to get messed up.
Anyone familiar with Julia Child’s “Mastering the Art of French Cooking” might recognize Canard en Croute as one of the more daunting recipes in the book. In reality, there’s not any one thing that’s actually too difficult or time consuming with the recipe, but it does require a pretty wide set of skills and a lot of small steps in the preparation that add up to make it a very time consuming effort. There’s a decent bit of knife work with deboning the duck. The experience necessary to know exactly how the dough should look and feel can take a long time to gain. There’s the sausage making, trussing, the browning of the duck, the artistic decorations on the pastry… It is definitely one that can test your patience and display your abilities (or lack thereof).
I decided to start with Julia’s recipe, but I was keeping in mind that I don’t have some of the meat that her recipe calls for. I don’t have veal and I’m low on pork for the sausage stuffing, so I opted for a venison sausage with a fairly large amount of pork fat added. The original recipe also calls for a 5 lb duck which most likely would mean using a Pekin duck in most situations. I wanted to get a little more adventerous and opted to use an 8 lbs Muscovy duck. Muscovies have far less fat than Pekins, the drakes are significantly larger, and they have a flavor reminicsent of lean beef sirloin.
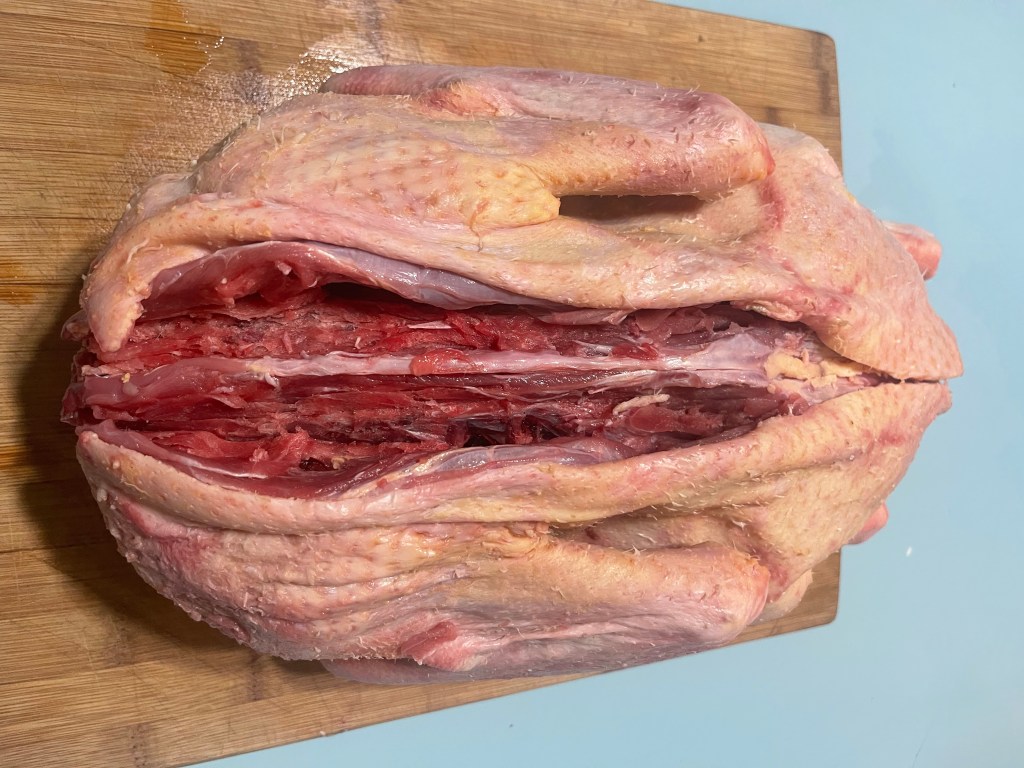
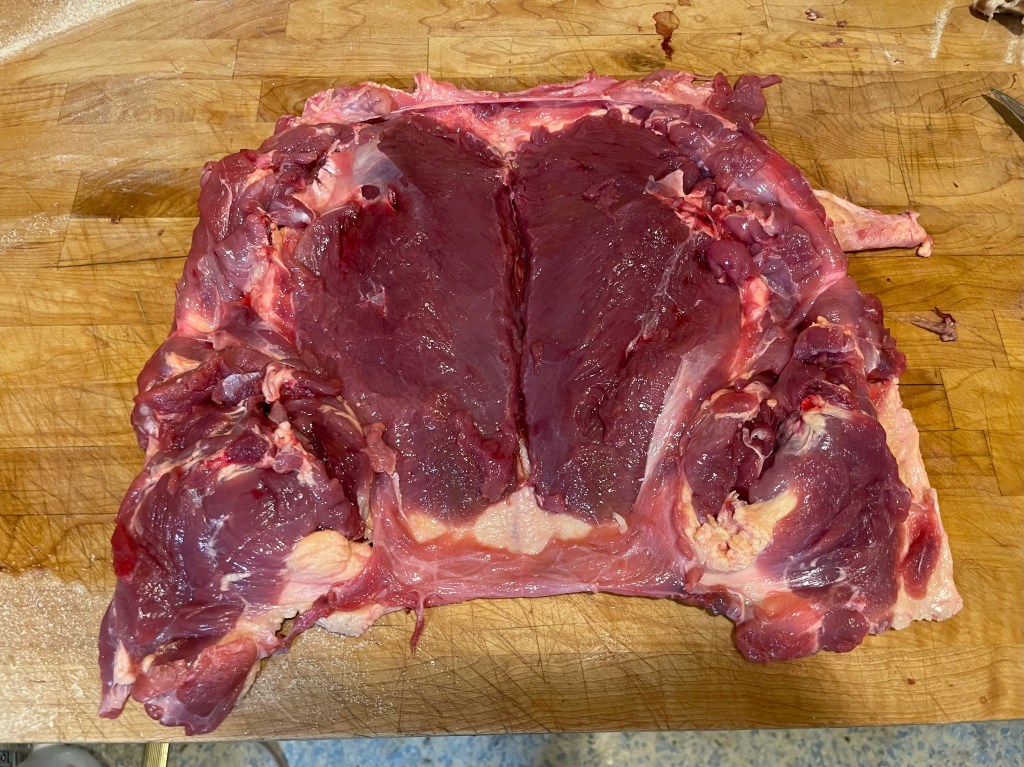
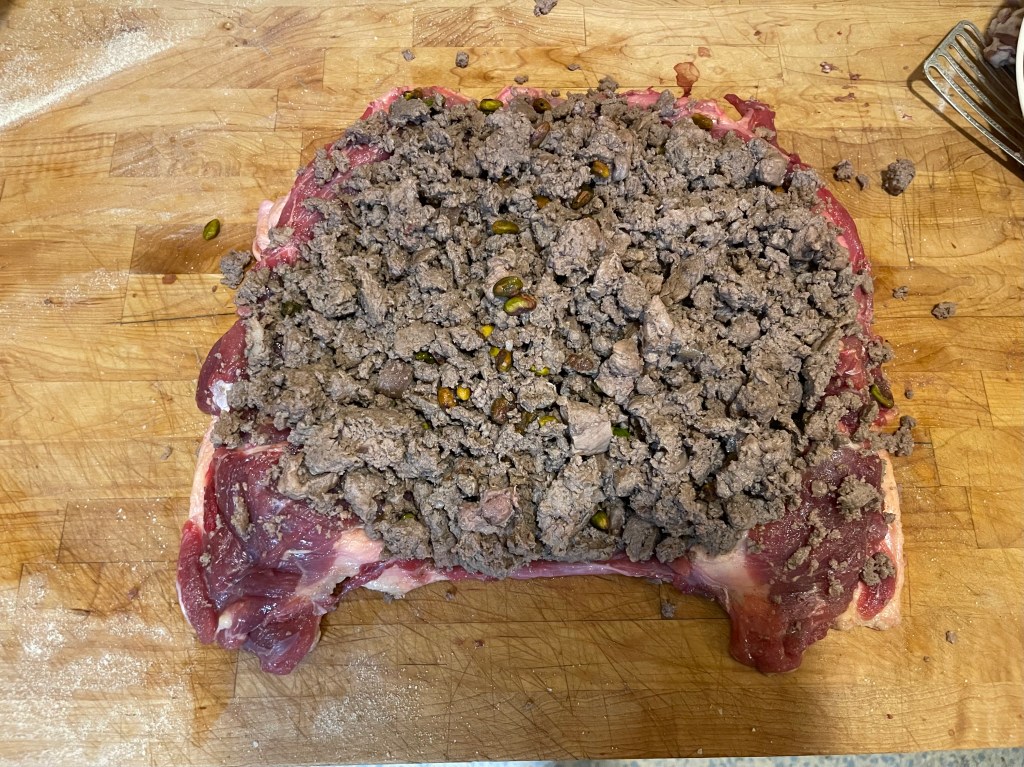
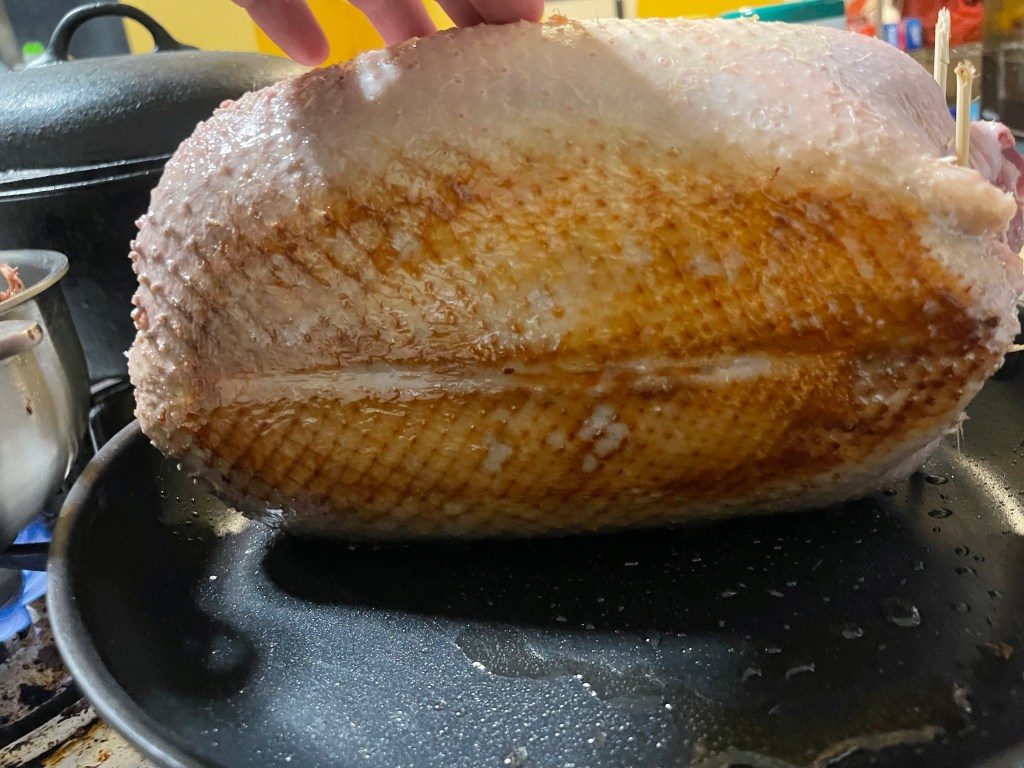
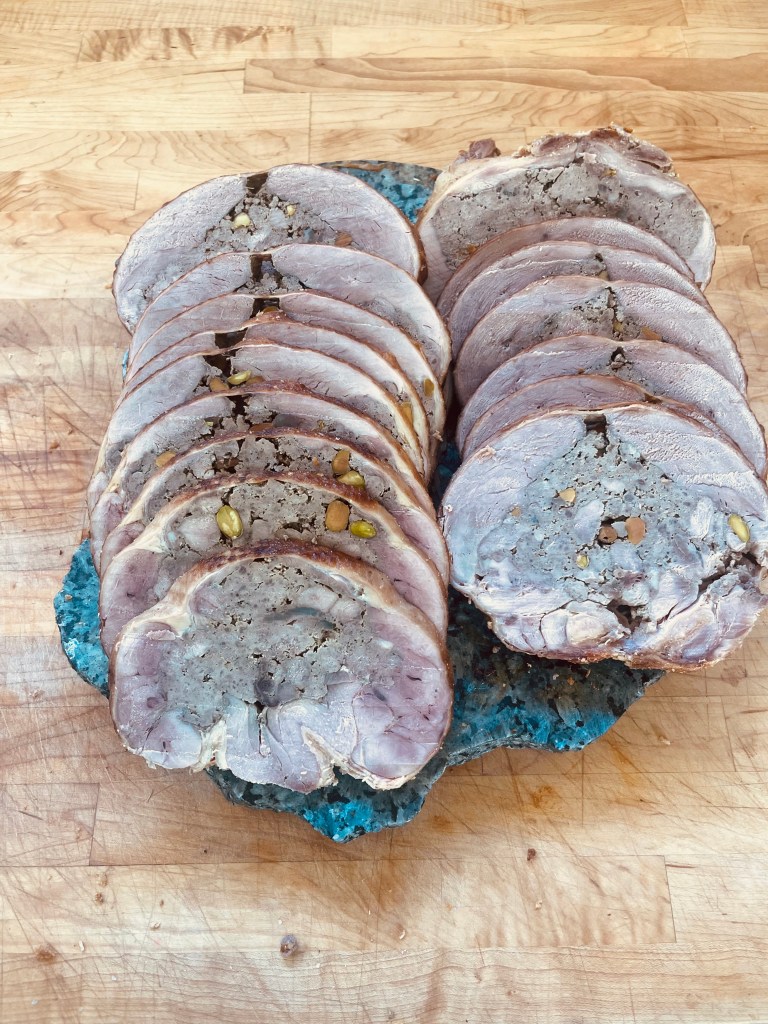
Using the lean Muscovy did make it a little bit more difficult to debone the duck without nicking the breast skin, but with just a little extra care, it wasn’t too bad. The whole deboning process took about 45 minutes, but almost half of that was me looking at the first cut marks and trying to figure out what I was looking at. I’ve taken apart many birds before but never in a manner that required such precision. A turducken for example can have the back bone cut out and the breast pulled. For Canard en Croute, you need the whole skin and flesh to remain intact so that it can be properly stuffed and sewn. After getting every bone removed, I trimmed the breasts so they would be a bit thinner, salted and seasoned the duck with thyme, and set it aside to work on the sausage. Using a food processor instead of a grinder, I mixed 3.5 lbs of venison trimmings with about 1 lb of pork back fat, Madeira wine, thyme, and cloves. After the mixture was emulsified, I browned the sausage along with chunks of the duck breast meat that I had trimmed off, and then mixed in pistachios and stuffed the duck with the mixture. After trussing the duck, I used my preferred method of browning duck skin, which is to place the duck in a cold pan, place it on the stove, and turn the heat to medium high. The fat renders as the pan heats up, there’s enough fat in the duck skin that it won’t stick despite the pan starting off cold, and you get perfectly golden brown skin every time in 5-6 minutes.

For the pastry, I needed a much larger pastry than Julia’s recipe called for since I was using a much larger duck. I milled 900 grams of Red Spring Wheat on a medium coarse setting, sifted the bran to create an 82% extraction, and milled a second time on the finest setting possible. Realistically, there’s nothing wrong with using regular All Purpose flour and it probably would be easier to work with and create a more tender pastry, but I enjoy the flavor of the freshly milled wheat. Being very careful to not overwork the dough, I mixed in 2 duck eggs, ice water, and a mixture of butter and leaf lard. I proceeded to roll it out thin and placed the duck into the pastry to wrap, rub with egg wash, and bake. Instead of the circular decorative pastry bits that Julia describes, I decided to add a festive flair by using Christmas tree and stocking shaped cookie cutters for the decorative bits.

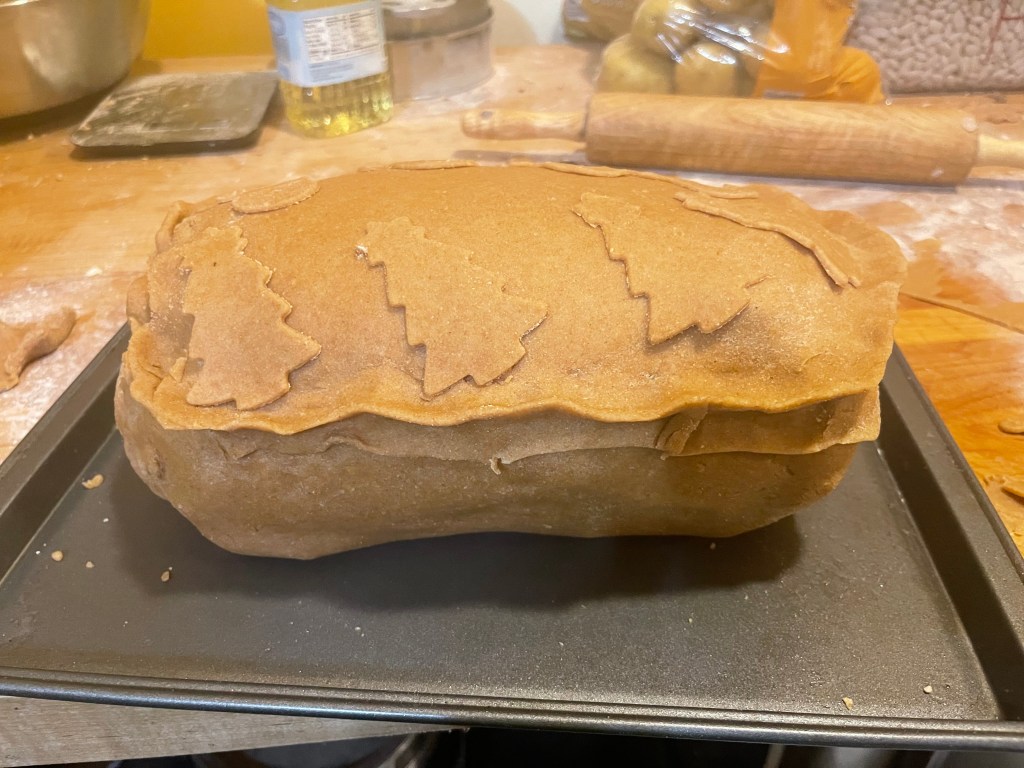

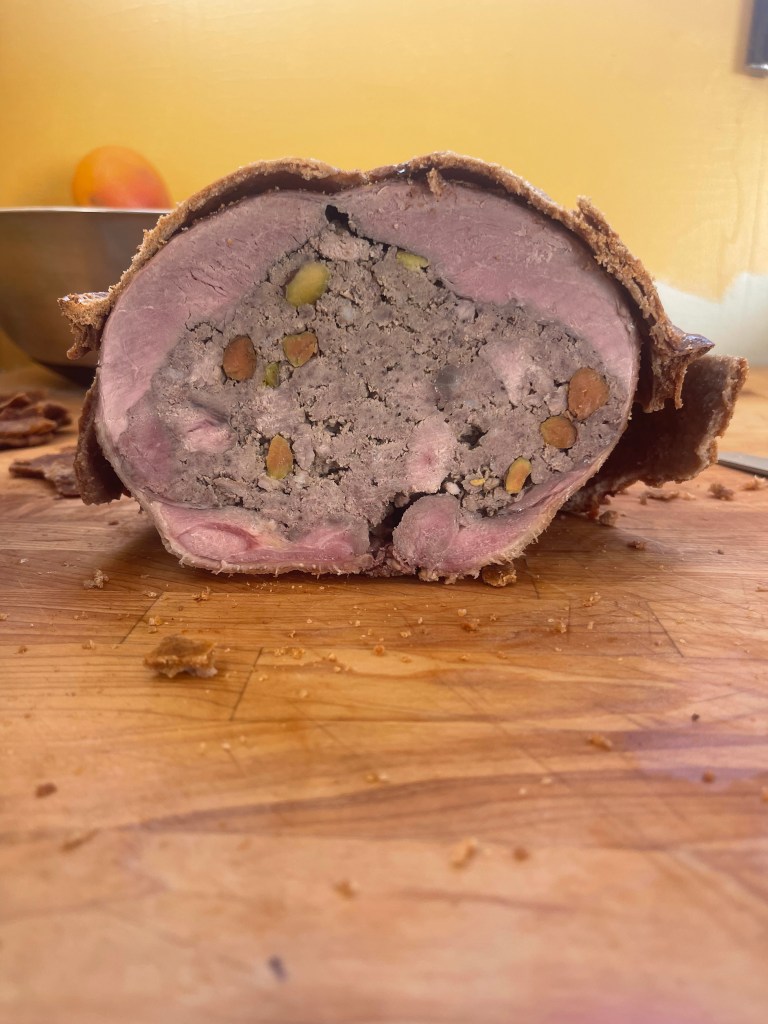
It took about 2 hours of baking at 350 degrees to reach an internal temperature of 180 degrees and then the whole dish needed to sit at room temperature for a few hours before being refrigerated for serving cold. I’ve seen many people try to serve this dish and they complain that the pastry crumbles. Most often, people that have this problem have opted to serve it warm or even still hot. The pastry will not slice properly while hot as it needs time to set after cooking. Unfortunately my pastry crumbled anyways despite proper care. I got to the point that I had the top properly removed without issues, but when I lifted the duck out the bottom pastry stuck to the bottom of the duck and it came out in sections. No big deal though as we were left with a nice, beautiful duck galantine with a side of pastry bits!
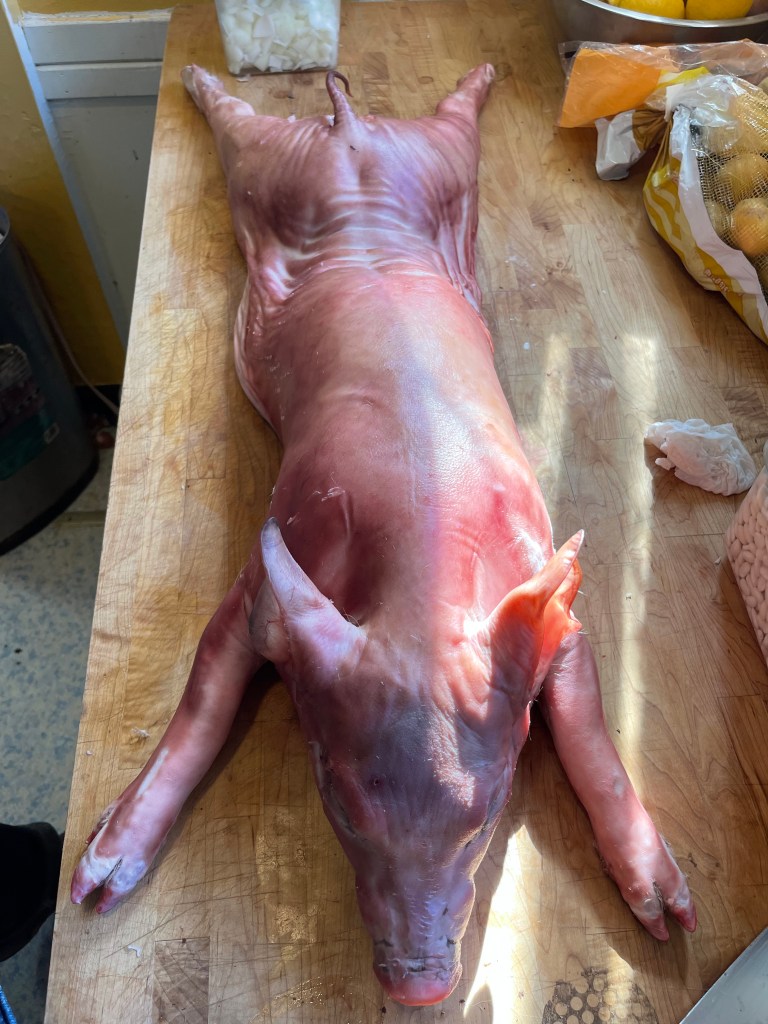
Suckling Pig
Suckling Pig is definitely the easiest of the dishes I’m serving this year. Pigs are great because they’re so easy to process. It is honestly the animal that you can look at that exemplifies the idea that something is made of meat more than any other animal. It really is like they’re designed to be taken apart for humans to consume. The funny thing is, many people will look at a suckling pig and be impressed because it is quite the spectacle, but in reality, it is a very simple preparation.
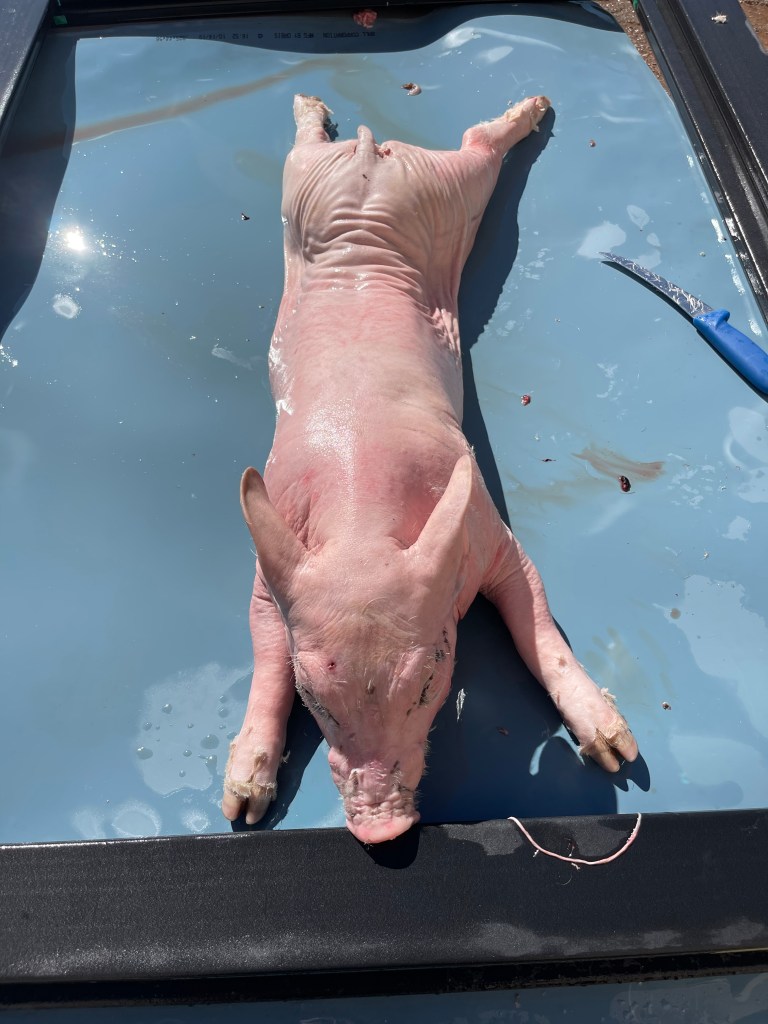
I coordinated with my friends at L&B Farm a few months ago to let them know that I would be needing a pig for Christmas Eve and I was wanting one that would dress out above 30 lbs. The pig they set aside for me was a Blue Butt pig which can be a cross of several different breeds. For this particular one, it has Yorkshire, Berkshire, and Hampshire genetics. This cross is known for it’s fast growth and impeccable meat quality.

The most difficult part of preparing a fresh pig is scalding and scraping the hair leaving the skin on for a nice crispy texture and brown appearance. With scalding water at 150 degrees, I dunked the pig and worked the water down to the skin. When the hair started to release easily, I pulled the pig out and scraped the hair right off with a knife. I harvested the heart, liver, and kidneys for future dishes and got the pig into a large refrigerator to cool down quickly and let the skin dry out. Any animal you are going to butcher and cook should always be given a minimum of 24 hours from processing to cooking or if you’ll be freezing the meat for future use, wait 24 hours minimum to freeze. This allows for the meat to relax and get past the rigor mortis stage.
Cooking the pig really couldn’t be easier with my set-up. First, you score the skin and rub salt all over the surface trying to get salt down into the scored marks. Next, you flip the pig over and inject it with citrus and seasonings of your choice. I went with a simple cumin and oregano in a blend of orange, grapefruit, and lemon juices.
Using a homemade roasting box, I placed the pig inside the box with the skin side down, put the lid on, and lit coals on top to heat the box. Every 30 minutes to an hour I added coals until the pig reached an internal temperature of 185 Degrees in the thickest part of the hams. At this point, the pig was flipped to skin side up, and the skin crisps until dark brown. Ideally there will be a few charred edges here and there. It’s easy to get hot spots in the center and end up with a few spots of burned skin, so it’s best to keep a close eye on the pig at this stage and keep the majority of the coals banked to the side with just a thin layer in the center. Don’t sweat it if you end up with some burned skin though… It will still be tasty.


Cassoulet
The final main dish of the night is one that is rapidly developing as my favorite meal. Duck legs are really best when cooked in duck fat for hours until tender and then the skin is crisped. Confit duck legs are then taken to another level when served as the topping of a bean and meat casserole. The romanticized story is that the city of Castelnaudary was under siege during The Hundred Years War. They gathered all the ingredients they could find to make a giant casserole which fed the soldiers who then rallied and won the war. When I first started researching how to make cassoulet, I thought I was going to find one quintessential recipe to work from, but as I soon found out, there are different cities with cassoulet traditions in France that are very passionate about their version of cassoulet. When I set out to make my first “traditional” cassoulet, I quickly realized that there really is no such thing. Some French chefs say that absolutely no bread crumbs can be used to make a crispy top while others use bread crumbs willy nilly. Some French chefs use pork, mutton, and duck legs while some others use only duck meat. Some use vegetables such as carrots and celery… The core of all of them though is that you have a casserole that includes a lot of meat and beans. So when I set out to start making cassoulet, rather than trying to emulate one specific region’s preferences, I decided the best way to honor the traditions would be to make a dish in the spirit of cassoulet. I wanted to really show off what duck can be in this version, so with the exception of some pork fat in the sausage, all the meat and broth in my cassoulet comes from ducks. This is another dish that requires some planning as it takes about 3 days to make properly if you don’t have preserved confit on hand already.
A traditional duck confit uses fresh shallots, onions, parsley, garlic and salt. You cover the duck in the mixture and seal it tightly for 24 hours. You then brush the cure off, submerge the meat fully in duck fat, and simmer until the meat is tender and pulling away front the bone. Confit is actually a preservation method so if you just put this back in your refrigerator still with the meat submerged, it will last for months without spoiling. When you’re ready to use it, you pull the meat out and sear the skin until deeply golden brown.
The day before making the cassoulet, soak dry beans and prepare sausage. A garlicky Toulouse sausage is very common in French recipes. It’s a simple sausage made with a coarsely ground pork, garlic, salt, and pepper. Nutmeg is commonly used as well but it really isn’t necessary. The beauty of this sausage is the simplicity. I opted to use 75% skinless Pekin duck breasts and 25% pork fat. Instead of a coarsely ground sausage, I wanted to make mine tender and easy to bite through so I used my food processor to emuslify the meat before stuffing it into hog casings. I would have preferred sheep’s casings for their narrow diameter, but the larger hog casings were fine. Most people slice the sausage into sections, but I prefer to leave them whole. The narrower diameter sheep casings allow for a better meat to bean ratio in each serving when the sausages are left in links rather than sliced.
To assemble the cassoulet, I started with slicing duck skins from the breasts that I used in the sausages into narrow strips to fry in a dutch oven. I cooked them until they crisped up like lardons (which would be a common ingredient in many cassoulets) and set them aside. Then I sauteed the sausages in the fat that rendered out of the skin until golden brown and set them aside. I then sauteed largely chopped onions in the fat until golden brown. I deglazed the dutch oven with duck broth that I had made with carcasses, heads, necks, and feet of ducks from my last round of processing, added drained beans, and mixed in the sausages and crispy duck skin. I placed the cassoulet into a 350 degree oven for 3 hours, breaking the crust on top each time it formed. After 3 hours I placed the confit duck legs on top and baked for one more hour until the beans were tender and creamy and the liquid flowed like thick lava on a plate.

I think this was probably the meal that required the most thought and prep work that I’ve cooked yet, but it was worth it to share my efforts with a group of family and friends.

Leave a comment